Buy The Book Today!

Available in hardback, paperback and on your favorite digital reader!

Amazon

Barnes & Noble
 photo Blog Divider_Bunting_zpswhndrcob.png

Monday

Guest Post- Princess Wear!

1 comments
As part of our continuing efforts to bring you all things princess we invited the fabulously talented Queen Mommy/Grandmother Jesi over to guest post a tutorial of her adorable appliqué onesie/shirt so that you can make one for your princess! Not only is Jesi a super seamstress she is a writer chronicling her life as a grandmother raising her grandchildren. Her blog will leave you a little teary and give you insights on things she is doing differently the 2nd time around. Make sure to check out both her blog and her adorable online store to see more of her appliqué creations!

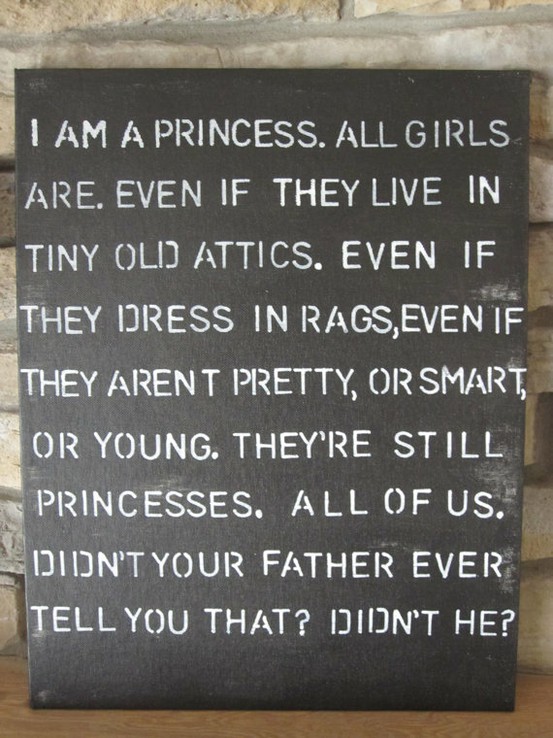
Welcome Queen Grandmother Jesi!

One of my favorite things to do is sew for my granddaughters. So when my daughter asked me to make an appliqué shirt for her daughter last fall I was up for the challenge. As I began making multiple holiday themed shirts, what started as fun ended up turning into SewGirl Designs. I’m excited I’m going to do something I’ve never done before! I get to share with all of you Queen
Mommy’s how to make one of my favorite birthday shirts.

Do you go to the craft fairs and boutiques and think, “I can do that” instead of buying the product but you never do? Or are you someone who doesn’t sew a stitch and keeps those boutiques in business? Well, even if you aren’t sure you can do it but don’t have the funds for boutique priced clothes, I’m here today to share some of my little secrets to creating an appliqué shirt for your little princesses.

First we’ll start with your list of supplies. I tend to scan instructions and jump in feet first. But this is the most important part of the project. Quality supplies are the key to a boutique quality finished product.
  • T-shirt or onesie – I get mine from a wholesale supplier. But the weight of the shirt is important if you are going to finish the appliqué by sewing. I recommend something like Carters brand for retail shirts. I’ve also used t-shirts from Target as well. I recommend spending a few more cents on the shirt if you plan to get a lot of wear from it
  • Fabric – In most cases you won’t need more than 1/8 of a yard for one shirt. This is less than $1 worth of fabric. You’ll want to decide on your design first, so you know if you have a need for more than this, or if this will be more than enough. Be sure to get your little princess to help pick out her favorite colors or fabrics!
  • Picture of design – The design I’m sharing today is really just letters and numbers I’ve printed off my computer. You can use clip art, or even pictures you print and trace to get the design you want.
  •  Iron on Adhesive – I use Heat n Bond. In fact, I swear by it. I’ve tried others and this one has never failed me. There are two types you can purchase - Sewable or Ultra Hold. I use Sewable, but if you aren’t going to sew it then I highly recommend Ultra Hold. Note: Do not use Ultra Hold if you are sewing, it will gunk up your machine needle and cause skipped stitches.
  •  Marker, scissors, iron, safety pin, sewing machine – This is the best part! If you don’t know how to sew, you can still make these shirts. Sewing machine is optional!
  • Ribbon to match – I get ribbon at Hobby Lobby on sale at half price. They have a rainbow of ribbons to match just about anything. You do not need a clip as the bow will be pinned on.
  • Studs or gems for crown – I get mine at Hobby Lobby. The type doesn’t matter, but please remember to use caution when adding these to infant clothing. I use E6000 glue and it is the only one I recommend. The gems will stick for the life of the garment.
This is a picture of the shirt we are going to make today. Don’t you think your little princess will love wearing this to her next birthday party? Having a princess party? Use princess fabric! Having a Dora party? Use Dora fabric! The ideas are unlimited!


1. Print your design – To begin with, I typed the name out on my computer and highlighted the letters. This allows me to change the font / size all at once. I made my letters 250 pts and my number is 350 pts. The designs typically need to be about 5 inches overall for infant sizes and 7 inches or so for toddler sizes. I print this on cardstock so I can reuse it and it’s also easier to trace. But plain paper works too. I also change the font to “outline” to use less ink. Do the same for the number – I use the Curlz font and 450 pt size – and the crown (use clip art or draw one if you can!).


Once the design is the size you want, print and cut it out. It is easier to use small scissors to cut out the design and get in the curves and corners. Set the pieces aside.


2. Prepare the fabric – Once you’ve decided on the fabric, press and lay right side down on the ironing surface. Cut a piece of the Heat n Bond large enough to lay out the pattern for each piece of fabric. Lay adhesive side down and iron on to fabric following package directions. NOTE: for sequined or finer fabrics, carefully press as the fabric will melt to the iron if it is too hot. Use the tip of the iron if needed to stay on the paper and away from directly touching the fabric.


3. Trace the design – Spread the fabric right side down across a table or hard surface. Place the design FACE DOWN and trace around the edges on to the paper backing of the Heat n Bond. Once you have traced all the pieces, cut out using sharp scissors. HINT: I use a Sharpie for tracing, but be careful of ink pens as the ink will not dry well and can get on the fabric. **Get your prince and princesses involved! Let them help trace the designs! Older children can even help cut them out! These do not have to be perfect, so have fun with this part!**


4. Apply the appliqué to the shirt or onesie – Lay the shirt across the ironing board. Peel the backing paper off each piece and lay right side up on the shirt. This is the time to move around until it’s ready to iron on. HINT: For infant sizes, always put the design closest to the neckline. This keeps the focal point on the face of the little princess wearing the shirt. Once in place, press with a hot iron on to shirt per package instructions.


HINT: For finer fabrics (sequin), use a scrap piece of cotton fabric to go between the iron and the appliqué to keep from damaging the finished design. ** Princess helpers can help peel the paper off and place the design on the shirt! **


5. Sew decorative edging (Optional)Remember, this step is optional. If you don’t sew and used the Ultra Heat n Bond, you can skip this step. But if you are using the Sewable Heat n Bond, stitch with a medium zig zag around the edge of each piece. I like to use a matching thread, or white depending on the design.


My personal preference is to give this an old-fashioned look by using a regular zig zag stitch. It can be difficult and frustrating to make this look like it was machine embroidered.

  • Trim the thread – When you finish sewing, it can look like a tangled mess. But don’t lose heart, just a few trims later and it will look great. Be sure to trim the front and back of the shirt. The below picture didn’t come out very well, but I wanted to show you what it looks like before it’s trimmed.


It’s particularly important to note how nice the inside of the shirt turns out. The picture below shows how nice it will be for your little princess to wear. Unlike machine embroidered items, these do not have any itchy stabilizer on the inside! HINT: If you used Ultra Heat n Bond press from the wrong side as well to give an extra bond to the applique.


6.Add the bow and gemstones – I love to use bows on my shirts and this one is no exception! The bow is made just like a hair bow, but I don’t add a clip. If you have one on an alligator clip, this can work too. All my bows are safety pinned on for easy care. Have fun with your little princess picking out ribbon or bows to use!


As a final note, be sure to wash in cold and hang to dry. Heat will affect the appliqué and glue bond on the shirt. If you iron too much or use too much heat in the dryer, it will become stiff or the gems can fall off. With proper care, these appliqués will last the lifetime of the shirt or onesie.

And that’s it! With a few supplies and a couple of hours, you have your own boutique quality appliqué shirt! Now that you know the how, the possibilities are endless! You can use this same technique on bags, backpacks, pants, shirts, jackets… Have fun filling your kingdom with lots of new designs!

Thank you for letting me share this project with you! I’d love to answer any questions and see how your shirts came out!

Wednesday

Didn't your Daddy tell you that you were a princess?

0 comments

My Father Did.


 I love that my husband also makes sure that his little princesses know just how special they are.


Take a minute today and tell the princess in your life just how special she is.


Monday

Guest Post- Read With Me Book Bags

0 comments
We are excited to welcome Marcie from A Happy Song as a guest poster over here at the Practically Perfect Princess! Last week we saw this adorable read with me book bag she shared on her blog and as reading addicts, authors and frequent library visitors Nicki and I wanted to share it with all of our other reading friends.

Happy Reading!

We love to frequent the library and the kids are getting to the point where they are borrowing quite a number of books each time we visit. This is unfortunate for me because I end up carrying all of them. So, I had a thought...

"Ding!" (that was the sound of a light bulb going off in my head)

What if I just get them some book bags that they can carry by themselves?  Maybe it wasn't the most creative of thoughts, but it was good enough for me.

I purchased some sturdy canvas bags from Hobby Lobby and some fabric paints.  I like the little Scribbles fabric paints. There's something about that magical 99 cent price tag.  I didn't want to dish out the money for letter stamps, so I decided to create my own.  I purchased a package of craft foam (in sheets) from the dollar store and layered it to give the stamps some depth. Then I glued on a layered foam square on each letter to use as a handle.  They actually worked pretty well, especially for what they cost me. Just a tip, if you are stamping onto fabric, those foam sheets are great to have as a backing under the fabric to prevent bleed through. 

The kids loved their new book bags. Jellybean calls her's her "baggy." As luck would have it, we had a few books on hold at the library, so we took the opportunity for a quick trip to try out the new bags.

I snapped these photos in the library. I tried to be sneaky about it, but there was no getting around the awkward stares from other parents. Maybe they didn't even mind, but I felt like I had to be extra clear that I was only taking photos of my own children.
The bags were awesome. Not only was it nice to be able to separate out Buddy's books from Jellybean's, but they are now a nice location to make sure that the library books stay together in one place, instead of being strewn throughout rooms and throughout the entire house. Am I the only one that has a problem with that?

Just added this photo because she is so cute. That is all.
Have a Happy Day!

~MJ

Friday

Ready for more Princess Fun? We are!

0 comments
Calling All Princesses!!!

We hope you can join us for some fabulous Princess fun at the following events!

Saturday August 11th, 2012


Your attendance is requested at a Princess tea party!

Princess crafts * Take a picture with a Princess* Princess story time * Practically Perfect Princess tea party *

12 noon to 2 pm
Bookmans
6230 E Speedway Blvd
Tucson, Arizona

Saturday September 22nd, 2012

Make sure you don't miss the Royal Princess Palooza!

Princess story time * Princess crafts * Take a picture with a Princess (if you came to the last Princess Palooza we will be introducing a new Princess at this event!) * Face painting by the Fairy Godmother*

12 noon to 2 pm
U of A Bookstores
1209 E University Blvd
Tucson, Arizona


September 23rd, 2012

The Best Literacy Event Ever !

Join The Queen Mommies for a practically perfect princess story time.

12:30 pm
Tucson Childrens Museum

Thursday

Princesses and Star Wars- Best of both worlds!

0 comments
My little boy is totally into Star Wars and on a recent Pinterest search I found the following pictures of princesses who totally rock! My son thought these were the coolest princesses he has ever seen and is trying to convince his sisters that one of these should be their Halloween costumes.

Rock on princesses!


Wednesday

Practically perfect wand for a little princess magic!

0 comments
Last week while spending time perusing some "blog awesomeness" I came across this darling craft project and knew I had to invite the amazing Queen Mommy Jenny over to share it with you all. We are so excited to have our first guest post over here at the Practically Perfect Princess. We just know you all are going to want to try it out for your little princesses!

Welcome Jenny!

Hi there, Queen Mommies and King Daddies!  My name is Jenny and I'm the Queen Mommy from The NY Melrose Family.


I'm usually sharing diy projects, recipes, organizational and party planning ideas with the help of a sassy assistant.  My assistant is my two and half year old daughter, Riley.  You might recognize her from the Princess Court of Princess Rebekah Grace.


Well, I'm here today to share one of my favorite projects that I've completed because Riley absolutely adores the final product.  Riley loves her sweets and anything girly, which makes it fun for this mama. She recently fell in love with the book, Camilla the Cupcake Fairy by Tim Bugbird.  I'm actually thinking of having her third birthday party based on the fairy.  Yes, her birthday is in December, I'm a planner.  What can I say?

I thought that magic wands would be a great party favor for during and after her party, but I needed to have a wand that looked like Camilla's so off to Hobby Lobby we went.  We picked up small wooden stars, gold glitter scrapbook paper, pink and red press on glitter hearts, wooden dowels, key rings and eye hooks.


The first thing I did was to mod podge the scrapbook paper onto the star so that Riley could help me stick on the glitter hearts.  There's a heart on the back as well.  I pre-drilled a short hole into the dowel to screw the eye hook in.  I then put the key chain through the eye hook.  I ended up hot gluing the star onto the top of the eye hook.  Riley managed to knock the star off within the first five minutes of it being completed so I really hot glued the you know what out of the star onto the eye hook.  It's still attached today and we made this over a week ago.


The next part is the ribbons.  My assistant clearly thought the ribbon served better as a telescope!


I tied four different colors of ribbon onto the key chain and wrapped another one around the dowel.  The ribbon on the dowel I hot glued down at the top and bottom.  The ribbon on the key chain I simply tied into a knot.  Someone looks happy, right?

Stop on over to The NY Melrose Family any time.  I'd love for you to join our weekly link party on Wednesdays for Whimsy Wednesdays.  You can also find me on Twitter and Facebook.

Monday

The Queen Mommies appear on The Morning Blend!

0 comments
Nicki and I had great fun with Ann and Mrs. Grant this morning on The Morning Blend.

You can watch the full segment here.


Thank you for letting us come on the show!

Saturday

How to turn your princess into a mermaid

3 comments
My littlest princess has been begging for a mermaid tail all summer long. I found a super easy mermaid tail idea and thought now this is something I could do!

First I picked out an inexpensive towel that had a cute pattern.


Then I added sticky back VELCRO to the two ends of the top portion of the towel so that it would fit securely and easily around my princess's waist. 

To create the mermaid tail divide the bottom of the towel in two equal potions and wrap two pony tail holders around each section.


Voila! Now you have a mermaid princess! MY little princess is now ready for her cousin Nicholas's birthday/swim party today! 


Wednesday

Why write about Princesses?

0 comments
I'll tell you why.

Yesterday, after a week away and while Queen Mommy Jen and King Daddy unloaded the car from vacation, we came inside to find out what our littlest Princess had been up to. After only ten minutes this is what we found.


Yes indeed, with 2 little Princesses in house and Nicki's Princess who is about to have a "royal" wedding to her British Prince Charming at the end of this month we do understand a thing or two about Princesses!


Tuesday

Rebekah Grace Gets Reviewed at Naptime Review

0 comments
We are VERY excited by the review of The Practically Perfect Princess from Julie at Naptime Review!

Julie started her blog just a few short months ago and has skyrocketed to success and gathered a very large following. We feel honored that Rebekah Grace is now listed among her reviewed items.

Here is an excerpt from her review, you can read the complete review here.

"When my daughter and I read this story together we had a lot of real life connections that we could discuss. She was especially shocked to learn that Princesses take naps! Rebekah Grace can relate to any preschooler who wants to be a princess in this everyday world. I recommend this book to anyone who has a princess in the house. It shows them it is OK not to be perfect."

You all know that we love seeing pictures of Princesses and we just had to share this picture of one of Queen Mommy Julie's  Princesses. Too cute!


Wednesday

Bunny Business Revisited

0 comments
Many of you know that my youngest child will be a flower girl in her cousin Erica's wedding (Nicki's daughter) at the end of July. A few weeks ago we shared with you that Rebekah has decided to wear her pink dance circus/bunny costume in her designated role as flower girl and is rather unhappy with any suggestions we make to discourage her.

This week Rebekah's dress arrived and all the girls in our family, including the bride got together for her first try-on of the dress with the hope that if we made a big deal about how lovely the dress is she would ditch the bunny costume.


Here she is in the dress and holding her newly made flower girl basket.
Thanks Erica!

Her smile is a good thing. We can now all breathe a collective sigh of relief that she has decided this dress will work and the bunny costume is no longer necessary.

There is one slight problem though......

Rebekah still has definite ideas about how she should look on her cousin's special day and those ideas include this purple crown/tiara.

Good grief!

Monday

New Review! The Practically Perfect Princess Is Perfection

0 comments
You know the Queen Mommies are always biting our fingernails each time we send Rebekah Grace out for review, but we are dancing in our heels with excitement over the BookWormMama's review! Hooray!

The BookWormMama has created an amazing community for Moms to gather, find information and discuss all of the things that matter. We were excited and honored when we found out that she would review The Practically Perfect Princess and thus began our current state of nail biting. Bad habit for Queen Mommies, but we are thrilled to hear that the book was enjoyed by both the BookWormMama and her princess!

Here's a snippet, but make sure to read the full review here:

"The story is one that you can read again and again. The illustrations playfully tell the story within the story. As I watched Rebekah Grace toddle around in her mother’s high heels, I couldn’t help but think back to my own princess days of rummaging through my mother’s closet.
Will Rebekah Grace ever get a handle on the princess rules? Will she be banished to the backyard–again? Will she learn to walk in Queen Mommy’s high heels? You’ll just have to read to find out.

If you’re wondering about the practically perfect princess at my house, she did sit down for most of the book. Not bad for an 18-month old. She pointed to Rebekah Grace and said, “Who that?” This question is usually reserved for my daughter’s pal Dora the Explorer, which I think means we’ll be reading the Rebekah Grace series for years to come."
 

Rebekah Grace Copyright © 2012 Design by Ipietoon Blogger Template